Automatic installation of a plugin is easy and you can also install on manually. It will involve manually downloading a plugin, uploading and activating it.
Make sure you already downloaded a zip file of the plugin to your desktop.
1. Login to your WordPress admin dashboard.
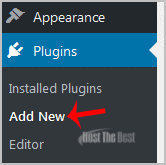
2. Under the dashboard menu, hover your mouse over "Plugins" and click on "Add New".
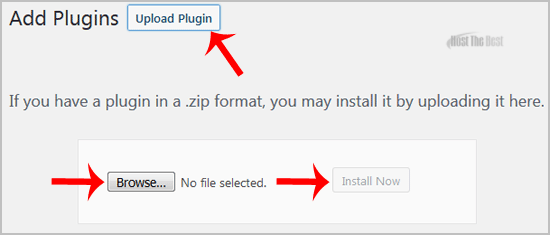
3. Click on "Upload Plugin" and then on "Browse". Chose your plugin"s zip file and then click on "Install Now".
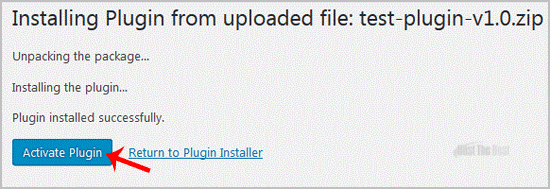
4. Click on "Activate Plugin".
Note: The newly activated plugin will show in the sidebar menu. If a setup of the plugin is required, it will show an option to complete it.
- 0 کاربر این را مفید یافتند
مقالات مربوطه
Powered by WHMCompleteSolution